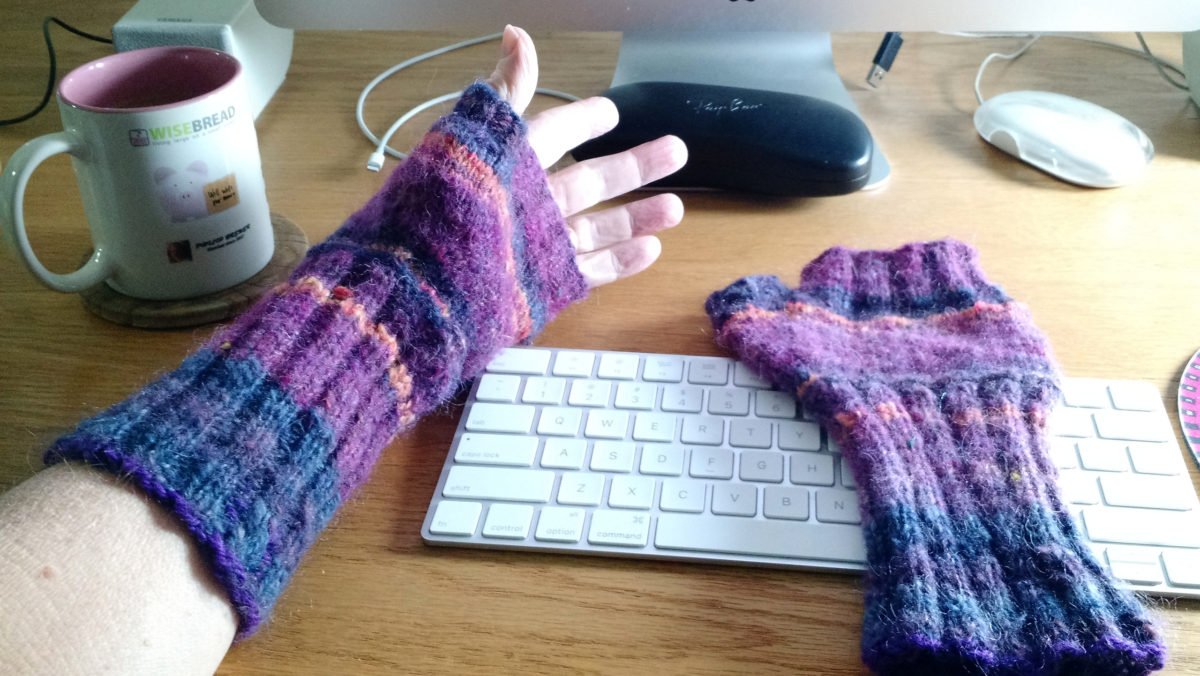
Fabric that’s comfortable all the way from kinda cool to slightly warm!

“keeping the wearer comfortably warm in temperatures as low as 11°C. Yet if the fabric is flipped inside-out, it could emit as much radiation as bare skin – keeping the wearer cool in temperatures as high as 24°C.”

Source: ‘Janus textile’ could keep you warm and cool you down – Physics World

For various reasons, having to do with trivialities like the layout of our old apartment, Jackie and I had gotten into the habit of dining in the living room, often in front of the TV.

At each of the places we’ve lived since then, the layout was more conducive to dining at the table. Our summer place had a kitchen table in the kitchen, and we took nearly all of our meals there. In our winter palace, we put our dining table in the area of the living room that was obviously intended to be the dining area—closest to the kitchen, with a lamp over the spot for the table—and continued to eat at the table (even though much of the space was occupied by boxes).

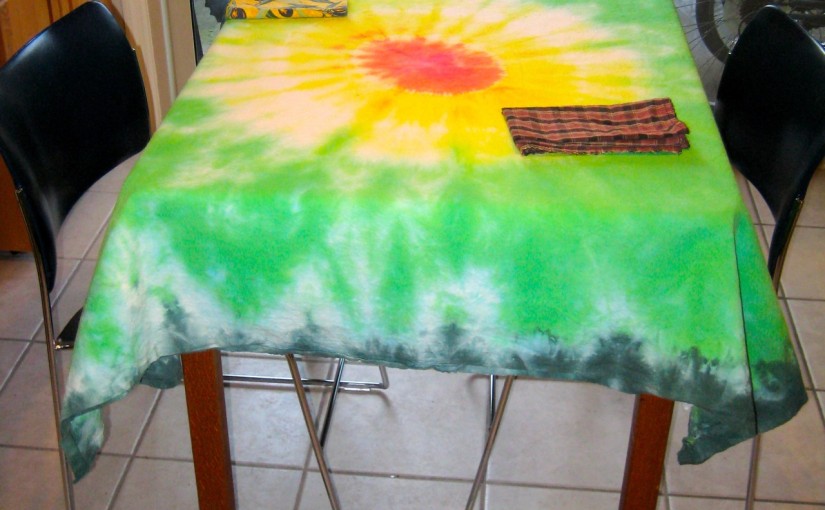
tie-dye-tableclothHere at Winfield Village, we have very nearly a full-fledged dining room, complete with a sliding glass door to the patio.

Although we’ve pressed a good bit of it into service as a pantry, there’s plenty of room for our little dining table, and we’ve continued to eat at the table.

Our old tablecloths had held up pretty well because they got little use, but now that we were using them all the time, Jackie wanted some new ones. She made one from a lovely piece of batik cloth that I’d brought home from a business trip to Singapore, which I declared probably the best tablecloth in the western hemisphere—until Jackie took some heavy muslin (that we’d previously used as a dropcloth to protect furniture against the depredations of the cat at our sublet), cut it to size, and dyed it some lovely spring colors.

After years of lazy, uncouth behavior, we are feeling very civilized.

I’ve fallen rather far behind on my posts about growing flax this year, so this is something of a catch-up post. It covers the work we’ve done since harvesting—and not only brings us up to date, but pretty much finishes up the series. Jackie will, of course, spin our flax fiber into yarn, but she spins all the time, so that’s just normal around here.

So, in quick succession, here are the next steps after harvesting:

Drying

It’s a little odd that you’re supposed to dry the flax, giving that the next step is to soak it in water, and yet that’s how it’s done, and who are we to go against tradition?

Here’s one of our little flax stacks. This is well along in drying, although you can see that some of the interior stems are still pretty green.
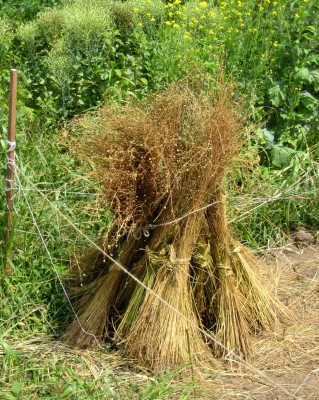
flax-stack

Rippling

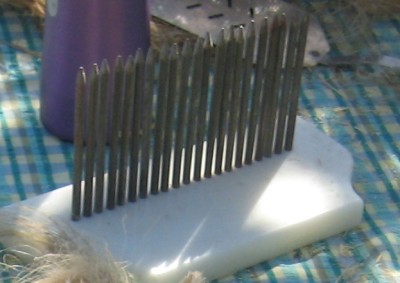
Once the plants are dry, you want to remove the seeds. There’s a tool that’s basically a bed of nails spaced appropriately for catching the seed pods.

I neglected to get a good picture of our ripple, but here’s one cropped out of a larger picture:
ripple

You just draw each bundle of plants through the ripple a few times, and collect the seed pods that pop off.

We got a big coffee container full of seed pods. Unfortunately, a lot of the seed pods only have two or three seeds in them, making it pretty tiresome work to get flax seeds. If you spend about fifteen minutes at it, crushing each pod and then getting the seeds out, you can get maybe a quarter-teaspoon of seeds.

I blame colony collapse disorder. (Flax is bee-pollinated. The native bees do the best they can, but evidently without complete success.)

Retting

Once the flax is dry, you rett it—you subject it to a controlled rotting process, the purpose of which is to do some damage to the stem so that you can get to the fibers.

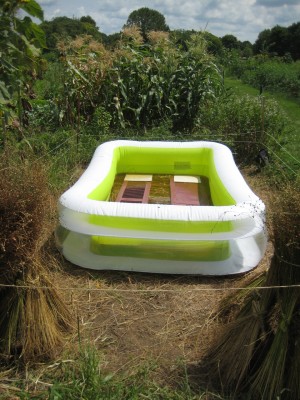
We retted our flax in a kiddy pool that we bought cheap at a local discount store:
retting-pool

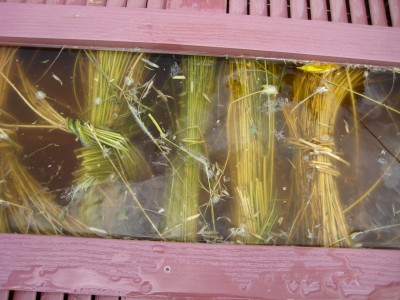
You need to weight the flax down so that it’s all under water. We used some vinyl shutters that we got cheap at the Habitat for Humanity ReStore, together with some cheap tiles as weights.

Here’s a closeup of the bundles under the weights:
retting-closeup

Retting is generally considered a stinky process, although ours wasn’t too bad. We retted each harvest separately, and it took about five days each time.

Drying, again

After retting, you have to dry the flax bundles. I didn’t get any pictures of this phase, but it’s not really different from the first phase of drying, except that now the bundles are rather limp, so that you need something for them to lean against if they’re going to stand up. The bundles have gotten lighter, though, so it doesn’t need to be anything very sturdy. We used the flower stalks of our bolted lettuce as supports.

Breaking

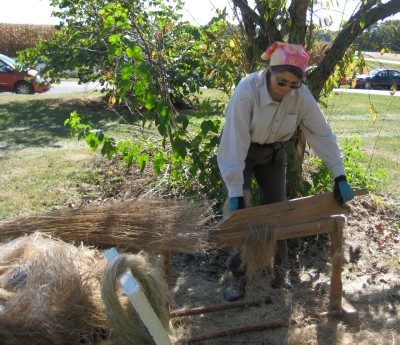
Once the stems are dry, you need to break up the stem material that surrounds the fibers. This can be done with your bare hands (I did a couple of stems by hand, just to see the process in detail), but it would be pretty time-consuming and tedious.  There’s a special tool for automating the process called a flax break. It’s kind of like a big paper-cutter, only with multiple blunt wooden blades

It turns out, there actually is a flax break not too far away, owned by Five Mile House, a historic homestead just south of Charleston, Illinois. They offered to let us use their flax break if we’d demonstrate how it was used.

So, on one Sunday in September, Jackie and I went to Charleston and “demonstrated” how to break flax. (I put the word in quotes because we really had no idea how to use the flax break, so our demonstration consisted mostly of letting people watch as we tried to figure it out.)

We only got about half the flax broken during that three-hour period, so we went back yesterday and finished the job.
jackie-breaking

Scutching

If you do a good job of breaking, most of the unwanted material falls right off. (That material is called “boon” and is supposed to be good for all sorts of things. Basically, it’s mulch.)

Inevitably, some bits will still be wrapped around your fibers. Those bits are removed through scutching, which is striking the fiber bundles with something sharp enough to scrap things off the fibers, but not sharp enough to cut them. A real scutching knife looks rather like a wooden sword. We didn’t have one, but made do with various other items, such as a spatulas.

Hackling

The last step is to comb the fibers to make them ready to spin. This step is called hackling, and is done with a hackle, which is basically a bed of nails like a multi-row ripple.
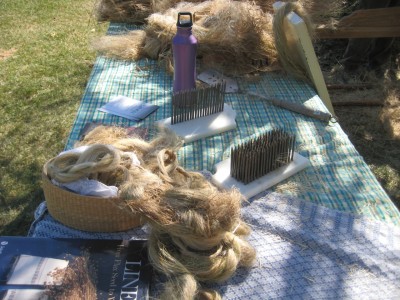
fiber-hackle-scutching-board

You just grab the scutched bundle in the middle and draw it through the hackle. Any short or tangled fibers will get caught in the hackle, and after a few passes, the bundle in hand will be a tidy bundle of long, straight, neatly aligned fibers. The long fibers are called “line” flax, and are considered the good stuff. The short fibers are called “tow” and are perfectly good fibers, useful for many things, but not fine linens.

In our second visit to Five Mile House we finished breaking our flax. We also got a good bit scutched and hackled. What had been enough flax bundles to completely fill the back of our hatchback is now just three paper grocery bags full of fiber.

That’ll be enough to keep Jackie spinning through the winter.

It’s been a very interesting process, and a lot of fun, but I doubt if we’ll do it again.

My plan for next year, as crop to occupy a big chunk of the garden so we don’t have to keep weeding it, is barley. (First year, malt syrup. If that works, second year, maybe beer.)

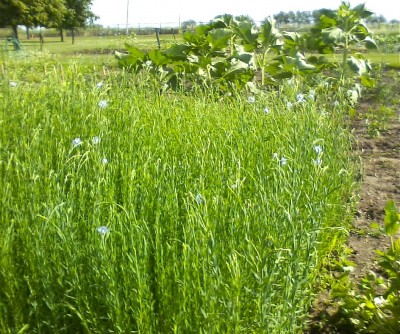
first flax flowersJackie and I visited our garden today, where we’re growing flax with an eye toward making linen. We were pleased to find the first flowers on our flax plants.

Sorry for the crappy photo—I neglected to bring my camera, so this was taken with my phone. Worse, it was windy, so everything was moving. Still, it gives you a general idea of how our flax is coming along—close to knee-high, and very thick and lush. (Apparently growing very thick is preferred if you’re growing flax for fiber, rather than for seed. Thickly packed plants grow straight and tall without branching, so you get the longest fibers. More sparsely grown plants tend to branch out, which is fine if you’re growing the plants for flax seeds, but not ideal if you want textile fiber.)

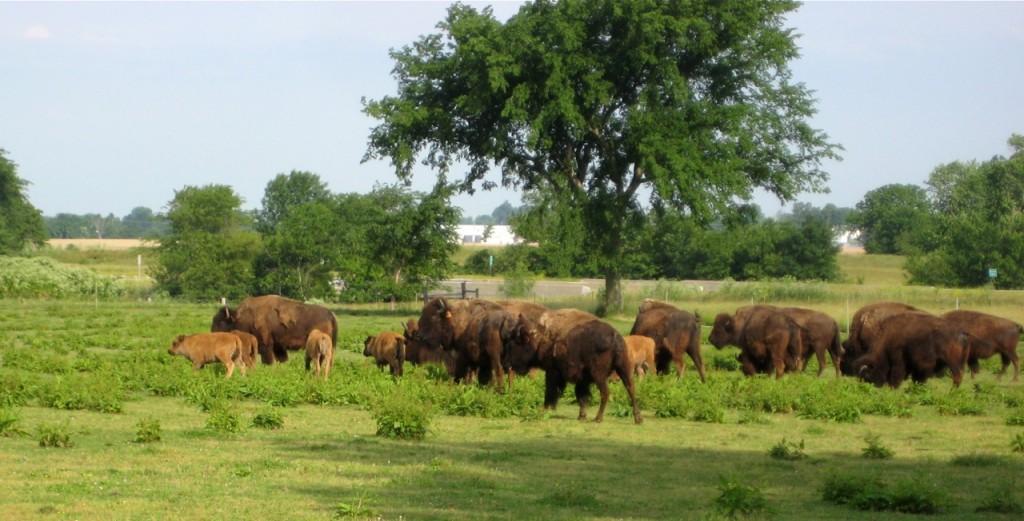
Somewhat more successfully, I took this photo of some bison with calves, in a field behind the hotel where we stayed in Greenville for our Sharp family reunion.

bison with calves

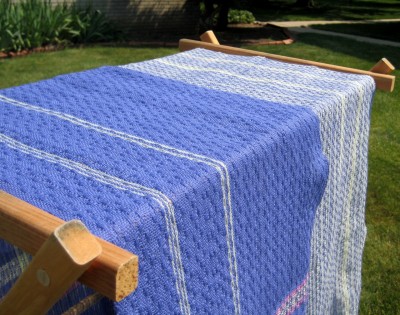
I did a photo-shoot for Jackie this morning, taking some pictures of her new fabric fresh off the loom.

I rather liked this picture, which I think captures the texture of the fabric rather nicely. (Click the photo for a larger image.)

As I type this, she’s preparing to wind a warp for another piece of fabric to go with this one.

As I understand it, she’s making three difference pieces of fabric with three different weave structures, but all three made out of the same cotton yarn. Then she’s planning to use the fabric to make a blouse.

I expect Jackie will be posting on her new fabric shortly, with additional photos. So if you’re interested, keep an eye on her blog.

Jackie has an update about her latest project, in which she’s weaving something called Huck Lace.

I mostly wanted to draw attention to the third picture, in which I captured Rapunzel “helping.” In this case, she’s helping by poking her face up through the warp.

Pure luck that I got that picture—her head wasn’t even headed that way when I pressed the button, but there it was in the captured image.

Jackie and I went to the Forest Glen Preserve, a nature preserve in eastern Illinois, over near the Indiana border.

We scouted the campgrounds, because the local Esperanto group is planning to some tendumado. We found two, although there’s at least one more.

One is a pretty ordinary Midwestern campground with a mixture of tents and RVs. It was pretty full, but only as crowded as you’d expect on Saturday morning of Memorial Day weekend. It had showers and flush toilets, firewood on sale, etc.

Near that one (but far enough away that noise wouldn’t be a problem) was the “tent campground.” It was different in that it didn’t have parking spaces for the campsites. There was an area just a few yards away where you could leave your car for up to 20 minutes to unload, and then you were supposed to move it to a parking area that was still really quite close—I’ve carried my luggage further in a hotel. Still, it seemed to be enough to discourage campers. Even Memorial Day weekend, there was nobody there—sixteen vacant campsites. (It did lack flush toilets. Also, the recent rain had left some of the campsites under water, although the dry sites were also vacant.)

Once we’d scouted the campgrounds, we went for a hike. We picked the Big Woods trail, which a posted list had described as the most rugged of the preserve’s trails. We took that with a grain of salt. Here in the flatland, pretty much any change in elevation seems to qualify a trail as rugged,  but it was somewhat rugged. The train went down twice into ravines, then back up again, and ended at an observation tower at what I assume is the high point of the preserve.

We saw plenty of neat stuff—sugar maples and tulip trees, white oak, sassafras, ferns, various kinds of mushrooms. (I saw what might be the tallest sassafras tree I’ve ever seen. It was huge. I usually think of sassafras as being scrubby little things.)

The trail was muddy, but only very muddy in a few places (plus, of course, the places where it crossed running water). We ran into three very wet, dirty guys with tools who said they’d been doing trail maintenance.

The trail was only a little more than 1 mile, but out-and-back so we got in maybe 2 ¼ miles of hiking.

We left it at just that much hiking, because we still needed to go to the Viking Reenactment, which was the reason that we were visiting Forest Glen this weekend in particular.

Two of the reenactors seemed to focus on fiber crafts. One is a member of the spinners and weavers guild, and was using some of Jackie’s handspun yarn to demonstrate weaving with a warp-weighted loom. We had a fun chat.

The other fiber-crafty person told us about her theory of mud-colored peasants. Many reenactors, she said, end up with clothing in colors of sheep, because dyeing fabric is another whole skill that you need to learn—and making your own natural dyes is two or three more skills (growing or gathering dye plants, and learning how to prepare them for dye use). However, in her experience meeting actual modern-day poor peasants, even the really poor ones go to considerable effort to not be the color of mud. Hence, she proposed, actual Viking-era villagers probably wore clothing that was as brightly colored as possible, within the limits of the natural dyes that were available to them. (They had several sources of yellow, yellowish green, red, and purplish red. Blue was available. A really good green was tricky, because you had to get a good yellow and then overdye with blue.)

Despite her theories, all the other reenactors seemed to be wearing clothing in natural colors.

What with scouting and hiking and viking, it was already lunch time. We had lunch at Gross’ Burgers, then headed home (pausing just a bit at a rest stop to let a severe thunderstorm pass).

A good outing.